
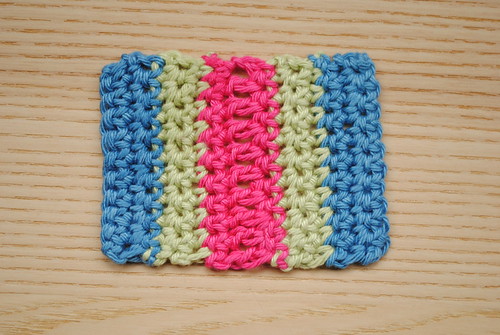
This tutorial shows you how to crochet a this very basic little rectangle using two crochet stitches - the single crochet stitch and the double crochet stitch. You could use this just for practice then rip it out afterwards and move on, or you could just keep going and make a nice long (if very narrow!) scarf :)
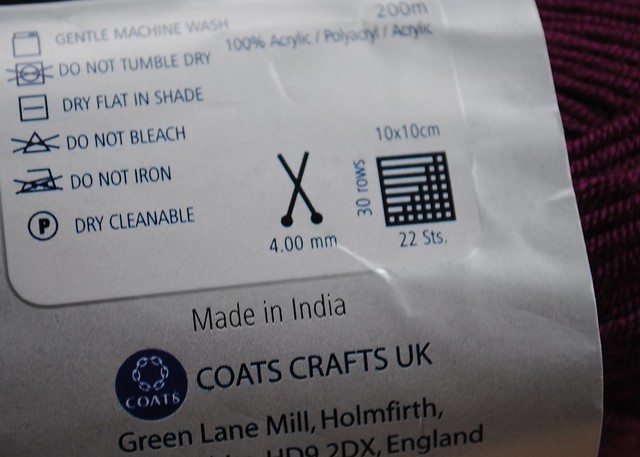
- Yarn
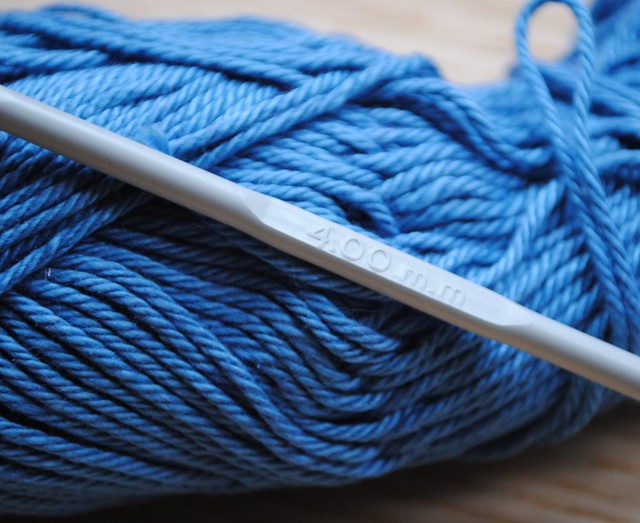
- A crochet hook
Please note: I am right handed so these instructions are for a right handed person. If you are left handed just reverse everything – hold your yarn and work in your right hand and imagine my pictures in mirror image!
Also, I use American crochet terms as that is how I learned and it makes more sense to me. You can find a conversion for American terms to English terms here if you want.
Every crochet project will start with a chain (ok, not strictly true, some will start with a magic ring, but we’ll look at those another day…) I like to think of crochet chains as bricks and ladders – you use them as the foundation for your work, and you also use them to climb up from row to row. So for our rectangle we are going to start with a chain of 11.
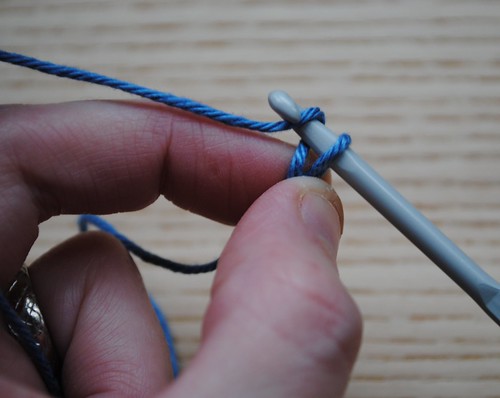
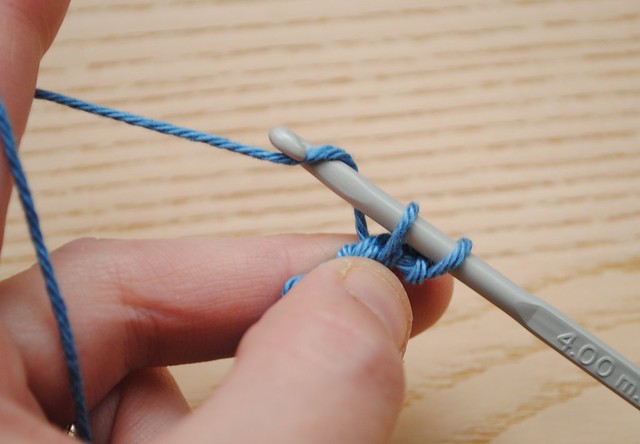
Start by making a slip knot (1)…
Start by making a slip knot (1)…
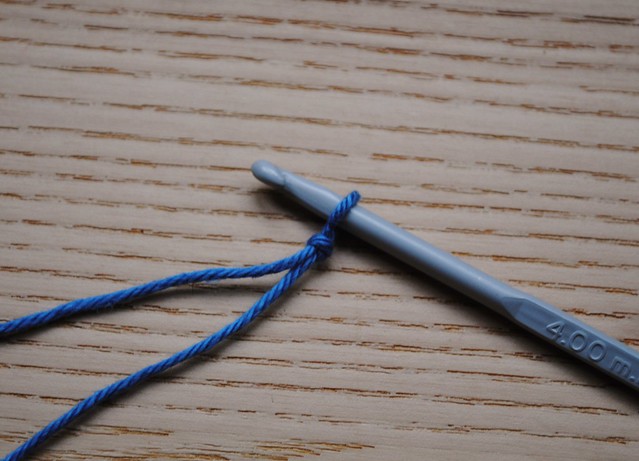
(If you don't know how to make a slip knot there are loads of tutorials on YouTube!)
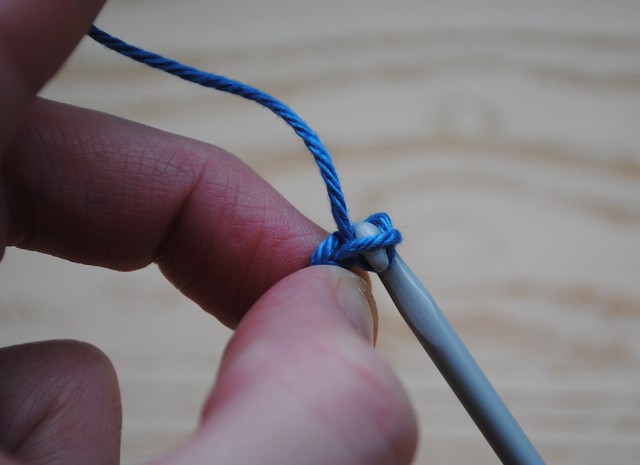
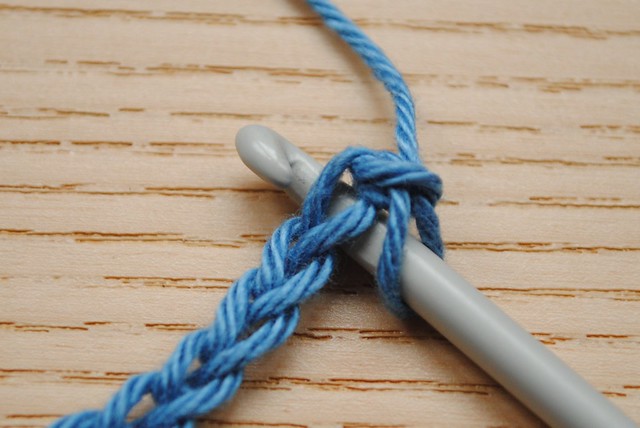
Hold the knot in your left hand and insert your hook into the loop and hook the yarn over your hook (2), and pull it through (3)…
Hold the knot in your left hand and insert your hook into the loop and hook the yarn over your hook (2), and pull it through (3)…
 |
| (2) |
 |
| (3) |
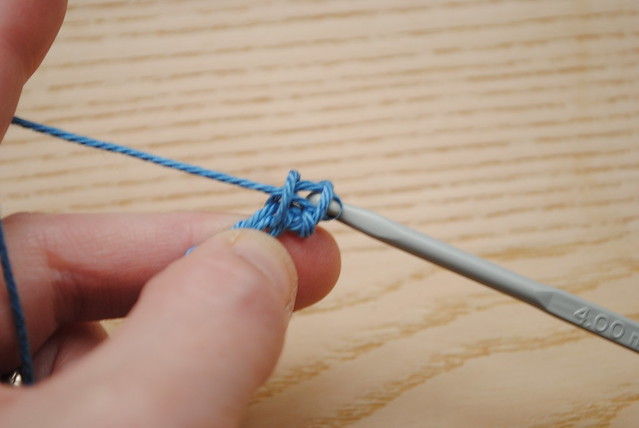
You’ve made your first chain!
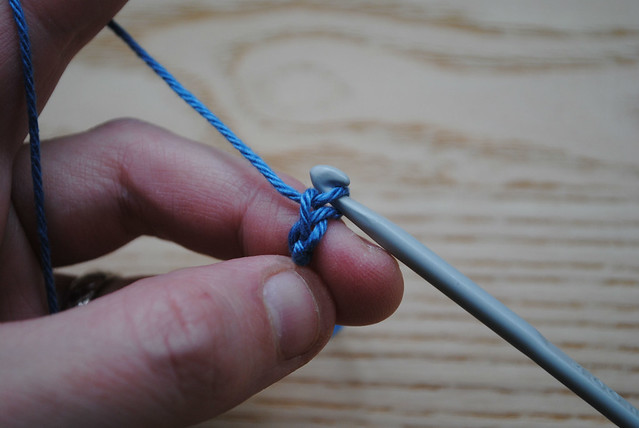
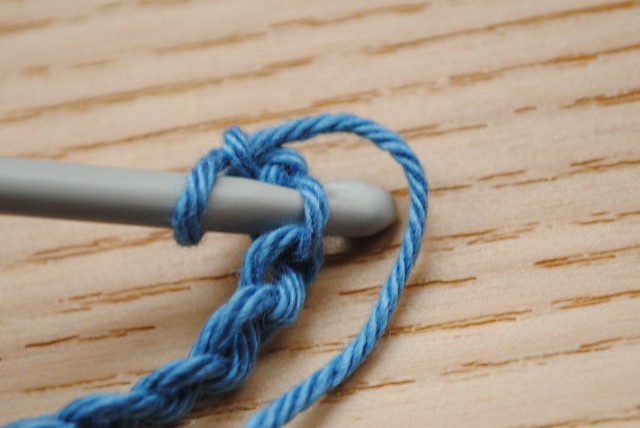
Now we need to make 10 more. Holding your yarn and your work in your left hand, continue to yarn over your hook again and pull it through the loop on your hook (4)…
If you lose count here’s how to count the chains you have already made: Look at your chains – they look like little “V”s, I have drawn a diagram below along side the chain, do you see how there are little V shapes of yarn, each one emerging from the the one before? Each V is one chain. So in this picture (5) I have five chains…
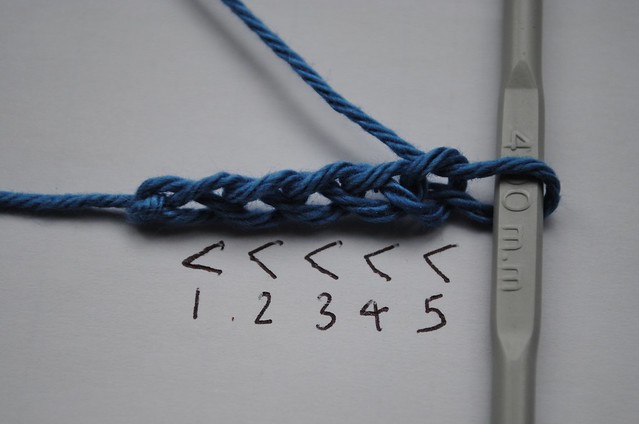
See? (Don’t count the loop hanging on your hook.)
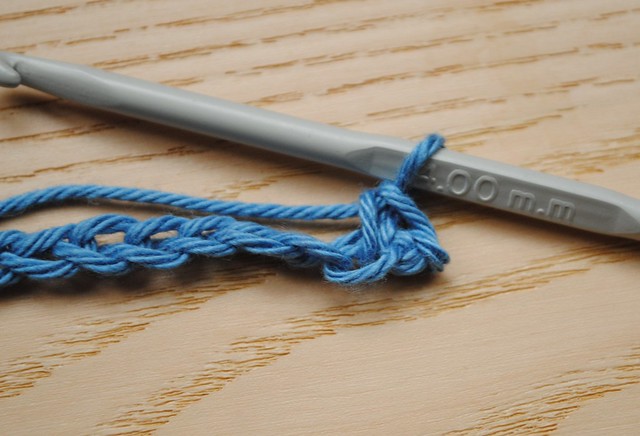
If you flip your chain over you will see a row of little bumps (6)…
If you flip your chain over you will see a row of little bumps (6)…
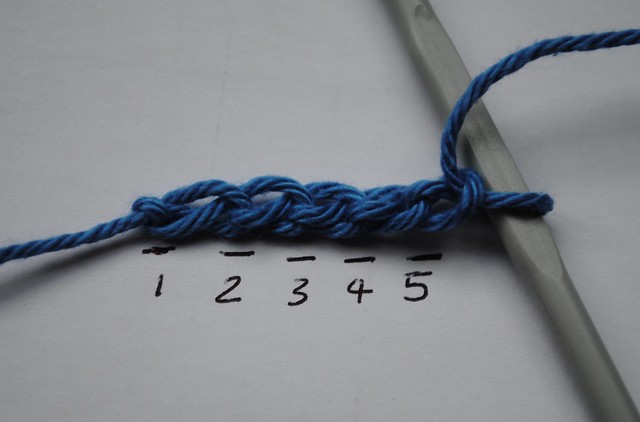
So now you have made your 11 chains!
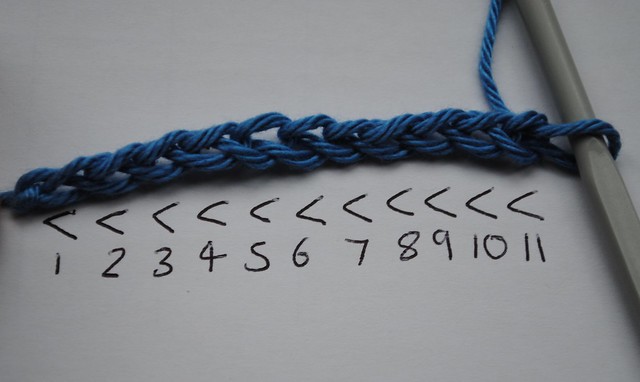
They look like a neat (or maybe slightly messy but that’s ok) row of“V”s (7)…
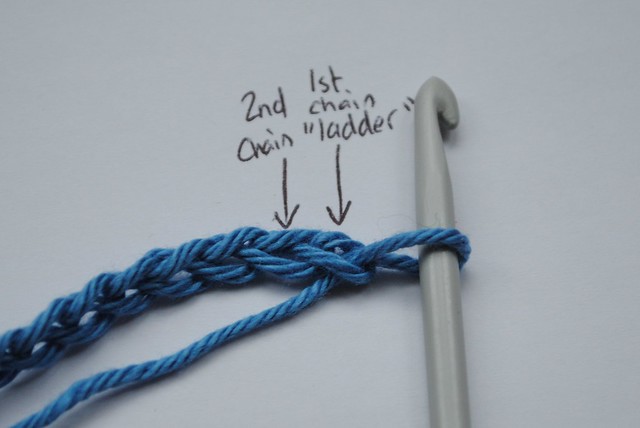
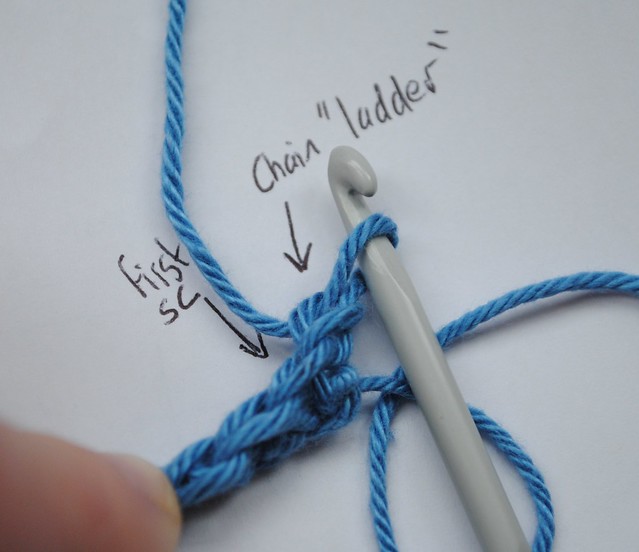
Are you wondering why we have made 11 chains and not a nice even 10? Well, it is because our rectangle is going to be a nice even 10 stitches wide but in order to crochet our first row we use 1 chain to “climb” up. So the first chain from your hook (8) is your ladder, the second chain from your hook (8) is the foundation “brick” for your first stitch.
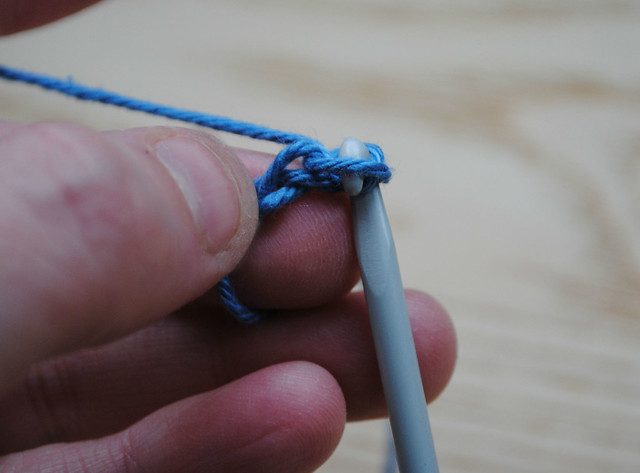
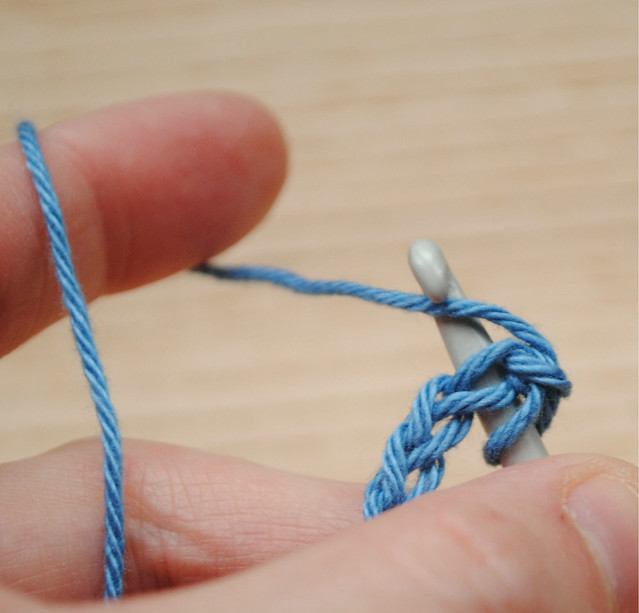
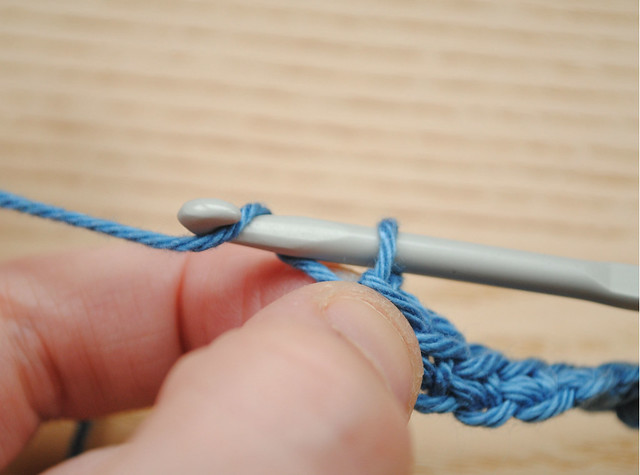
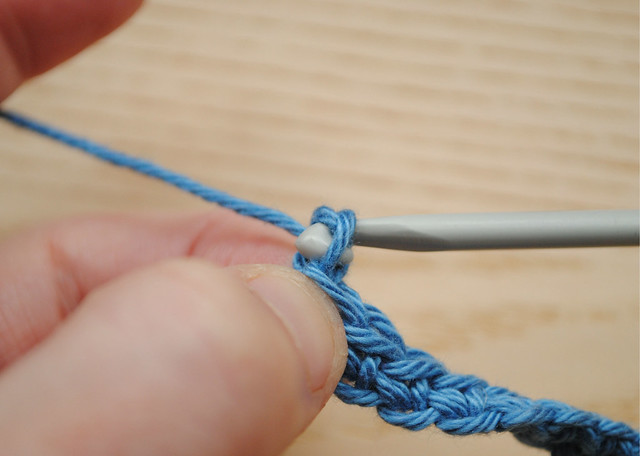
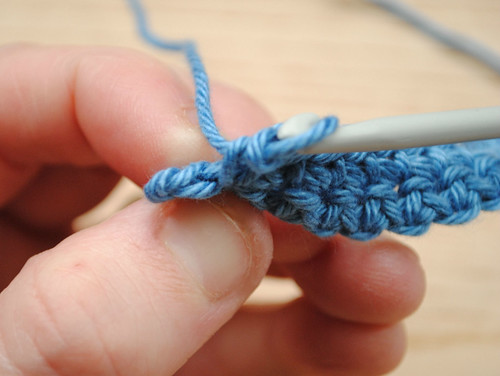
Hold your yarn and your work in your left hand (with the Vs on the top and the bumps underneath), skip the first chain from the hook (your ladder!) and insert your hook under the two branches of the V of the second chain (your brick) (9), make sure it slides between the V and the bump underneath (10)...
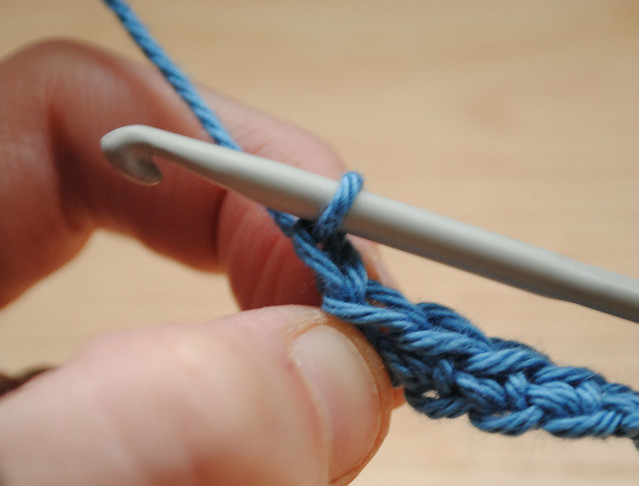
Now, yarn over and pull your yarn back through (11)…
 |
| (11) |
You now have two loops on your hook (12)…
 |
| (12) |
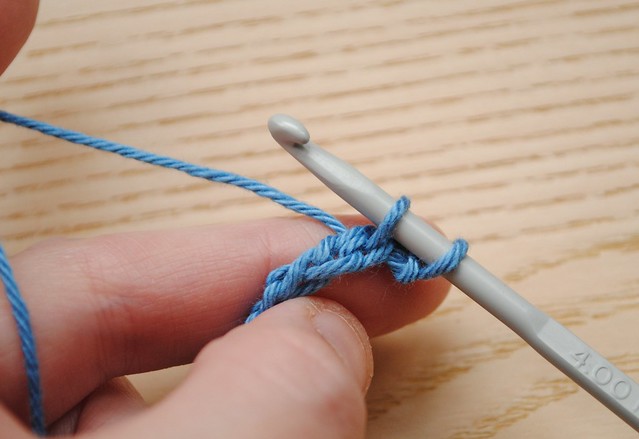
Now, yarn over again and pull the yarn through both loops on your hook (13 and 14)…
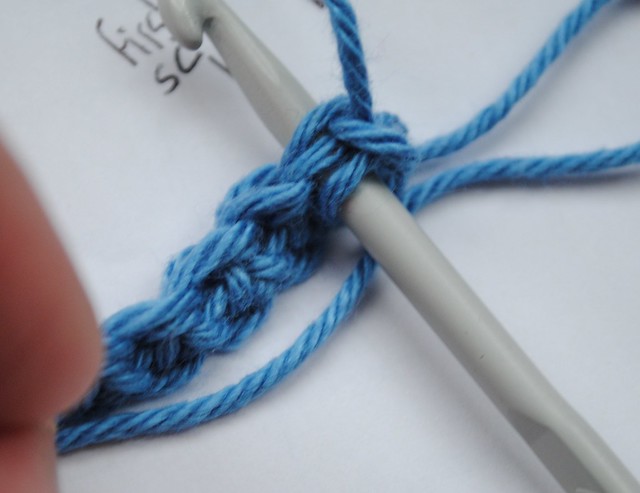
You have just made your first Single Crochet (sc) stitch (15)!
 |
| (15) |
Now, we are going to move along the rest of your chain and make a Single Crochet (SC) stitch into each one, this can be a bit tricky to get the hang of but persevere, even the most experienced of crocheters still get frustrated with working into the chain, it can be rather fiddly and the cause of much swearing under your breath.
Insert your hook into the next V, remembering to make sure that the bump on the underside is underneath your hook and that both branches of the V are above your hook…repeat steps 9-15 and voila! Another Single Crochet (sc) stitch! Now repeat this process all the way to the last chain.
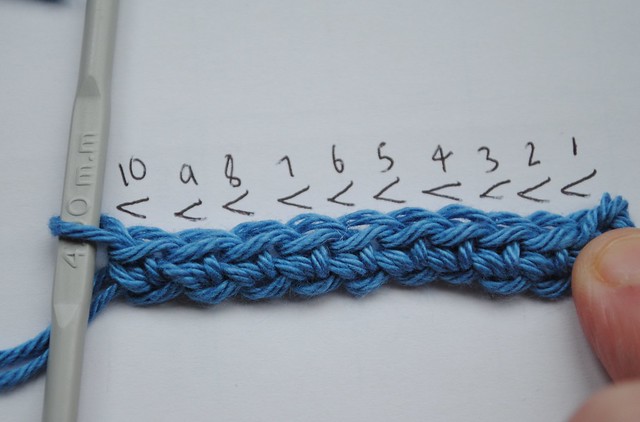
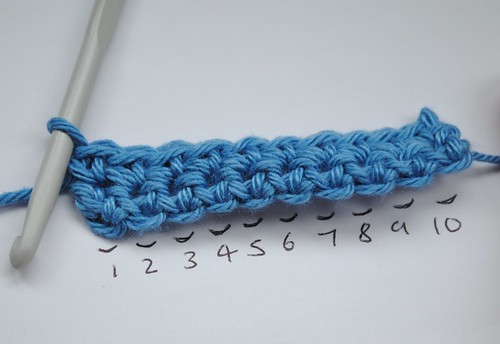
You now want to check you have done it properly and made the right number of stitches, luckily the top of your stitches also have the same “V” formation that your chains did.
So you just have to count your Vs (16)…
 |
| (16) |
You should have a row of 10. If you have less you have somehow skipped a chain, if you have more you have somehow worked two or more stitches into the same chain. Just undo your work and start again, it takes a bit of practice at first.
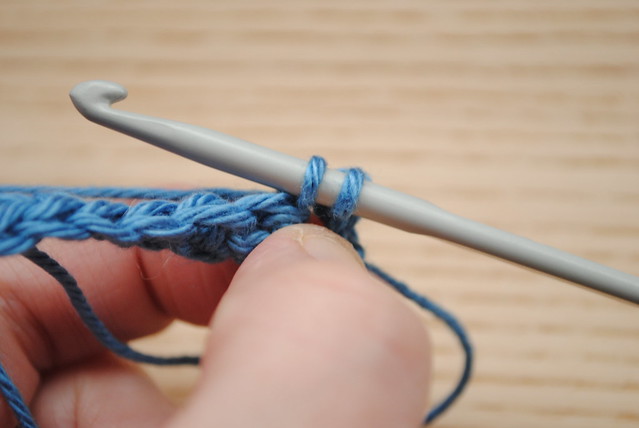
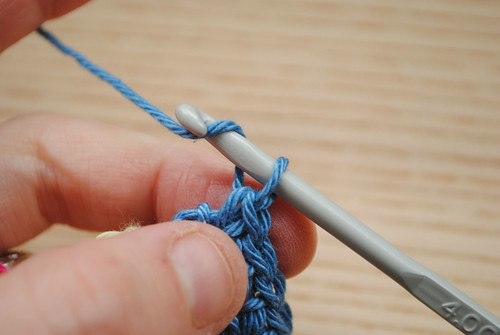
When you have 10 stitches it is time to climb up and do another row! We need to make another chain to be our ladder up to the start of the next row: yarn over and pull it through the loop already on your hook (17 and 18)...
You now have a chain (19)...
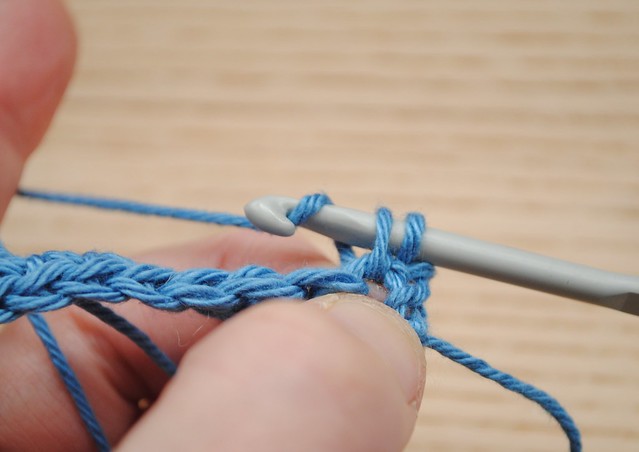
Next you make your first single crochet stitch in Row 2, skip the chain you just made (this is your ladder) and work into the first SC in this row (it will be the last SC you made in Row 1) This picture shows which SC you are aiming for (20)...
Make sure you insert your hook underneath the two branches of the V (21), you don't need to worry about that annoying "bump" like you did working into the previous foundation chain so it's much easier from here on!
 |
| (21) |
Yarn over and pull through - two loops on your hook (22)...
 |
| (22) |
Yarn over and pull through both loops (23 and 24)...

You have made the first SC in the second row! Now keep going until you get to the end of your row.
When you are starting out it can be tricky to work out which is the final stitch of the row (25). Just look for those tell-tale Vs (26)...
 |
| (25) |
 |
| (26) |
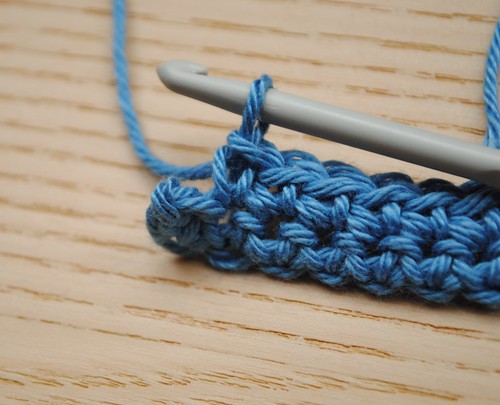
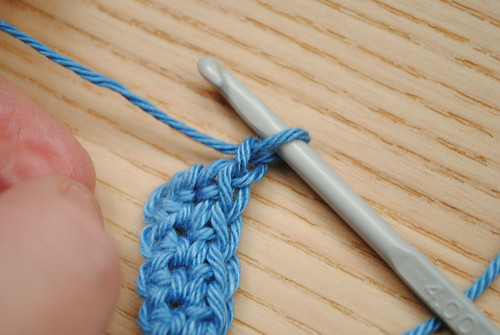
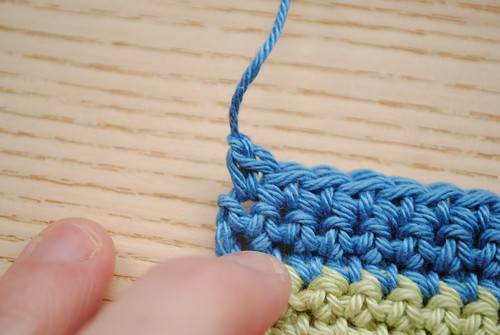
Ta dah! You have now made two rows of SC! If you lay your work flat you will see the ten little bumps from the foundation chain right at the bottom (27)...
 |
| (27) |
Shall we move on to Row 3? Right...Yarn over and pull through the loop on your hook to make a chain (28 and 29)...

Now repeat steps 21 -24 to make each SC along this row.
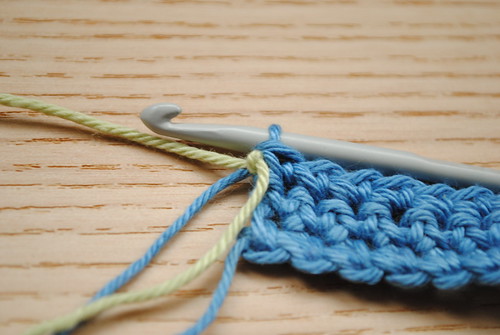
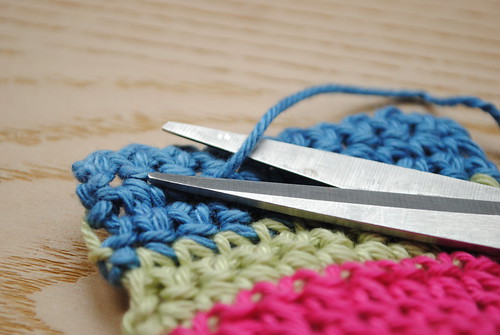
Next we are going to change colour! This is very simple - when you have made your last SC in Row 3 tie your new colour around your working yarn as close as humanly possible to your work (30). Tie it tight! Now snip your blue yarn and start working with your green yarn as if nothing happened :)
 |
| (30) |
Yarn over with your green yarn and pull through the loop (blue) on your hook (31 and 32)...
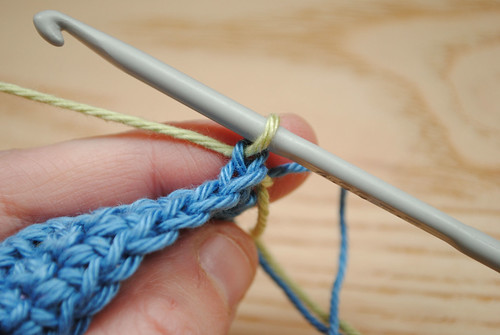
Now repeat steps 21-24 to make SCs all along Row 4. Then do another 2 rows of SC - remembering to create a chain stitch to "climb" up to each new row.
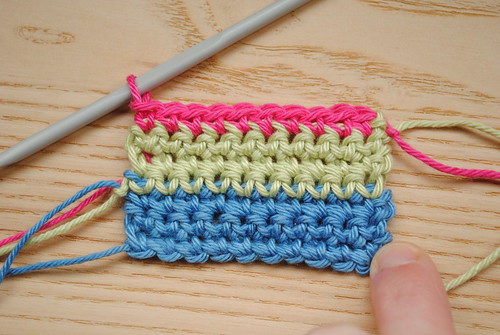
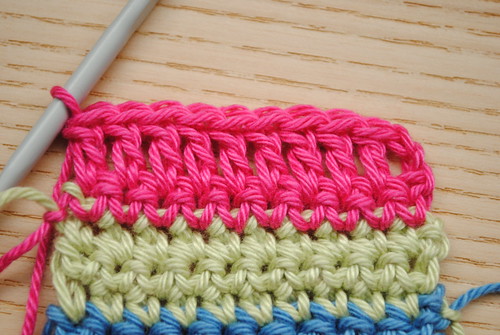
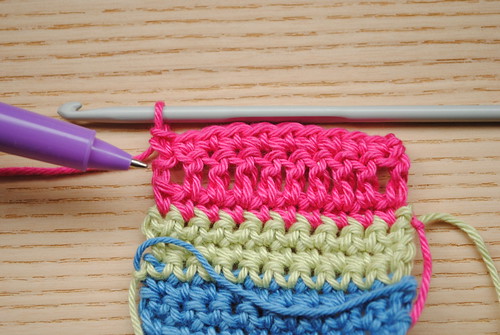
I then changed colour again and made a 7th row of SC in pink! (33)...
So by now you will hopefully be all over the SC like a rash. Are you ready to conquer something new? Shall we do a row of double crochet (DC)? Ok then!
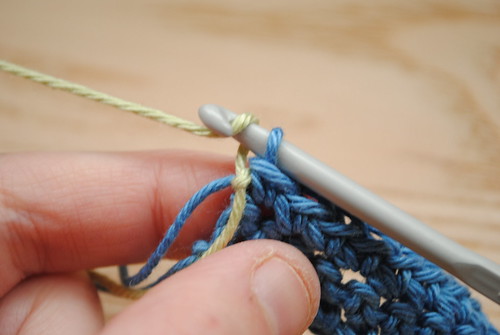
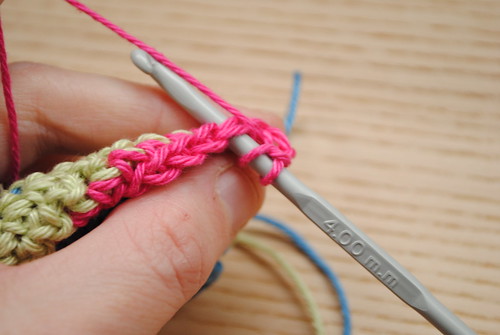
The double crochet stitch is taller than the SC. So we're going to need a bigger ladder: instead of one chain we need to make 2 chains. After making the last SC in Row 7 - yarn over, pull through the loop on your hook, then yarn over the pull through again (34)...

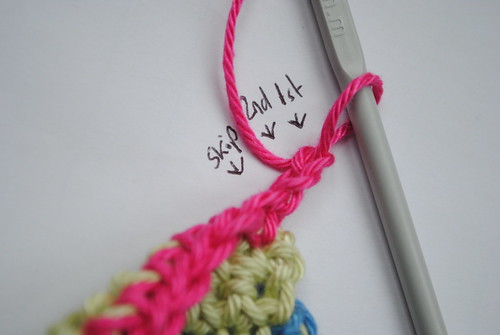
You have two chains. To make your first DC skip the two chains (marked 1st and 2nd) and also skip the first SC in Row 7, so you will be aiming for the 4th V from the hook (35)...
 |
| (35) |
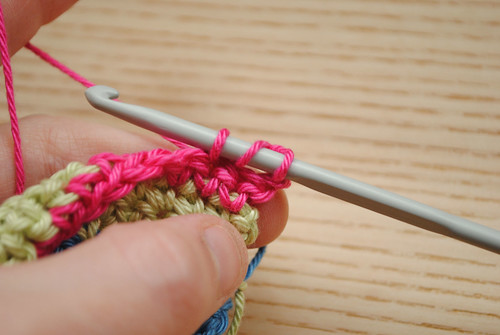
To make a double crochet stitch yarn over FIRST, then insert your hook into the SECOND SC (36) in Row 7 (the 4th V from your hook)
Yarn over again and pull through. You now have 3 loops on your hook (37)...
 |
| (37) |
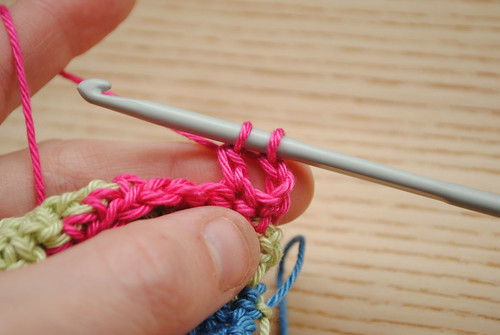
Yarn over and pull through the first TWO loops only. You should now have 2 loops on your hook (38)...
 |
| (38) |
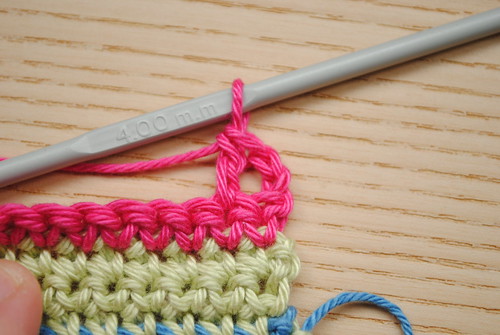
Yarn over again and pull through the remaining 2 loops on your hook. One DC stitch completed! This photo shows the starting chain of 2 (on the right) and the first DC stich (39)...
 |
| (39) |
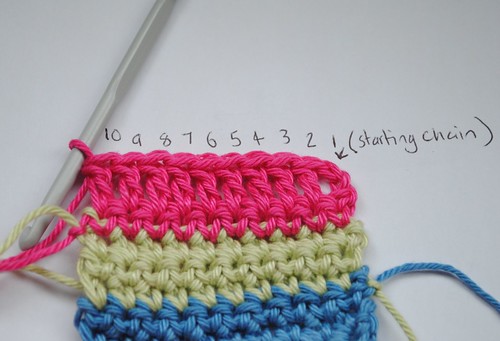
Repeat steps 36-39 all the way along to the end. You should now have ten DCs (40)...
 |
| (40) |
This picture (41)shows the 10 DCs with the starting chain of 2 on the right...
 |
| (41) |
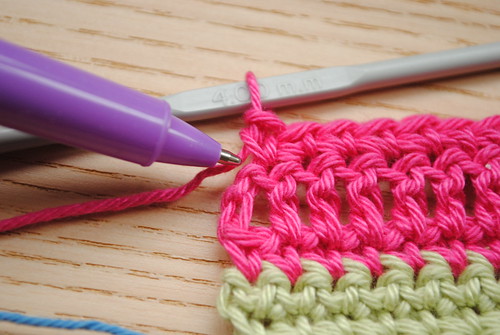
Ok. For Row 9 we will repeat steps17-24 to make a row of SC into the top of your Row 8 row of DC.
After you have made 9 SC you may well find yourself a bit stuck. Where is the top of the DC stitch? That nice V to work your 10th SC into? Well, think back to the beginning of Row 8 - remember that starting chain of 2? Well that chain of 2 is cheekily acting as a DC stitch! I am pointing to that cheeky chain of 2 with my pen, it can't hide (42)!
Here's that pesky chain of 2 seen from the side. Can you see the top V of the 2nd chain where I've marked it out in white (43)?

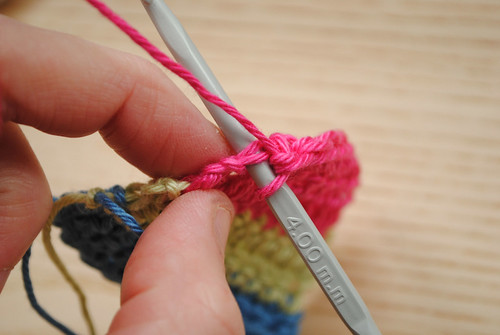
Insert your hook under the two branches of the V of that top chain. Make sure the "bump" of this chain in under your hook. This can be fiddly to do, especially if the chain is quite tight. Persevere! Wriggle your hook about a bit...have a cup of tea...wriggle a bit more...
When you have your hook inserted in the right place (44) then make your 10th SC to complete Row 9.
 |
| (44) |
My pen here is pointing to where I have made my SC into the top of the starting chain (45). You can't really tell can you? The starting chain is doing a very good job of acting as a DC :)
 |
| (45) |
For my practice rectangle I made another 3 rows of SC in green and another 3 rows of SC in blue. You can do this too, or stop sooner, or keep going and going until you have made a long very narrow scarf! Either way, you will need to finish off your work of art so it doesn't unravel. To finish off: work the last stitch in your row then yarn over (46)...
...pull through the loop on your hook (47)...
 |
| (47) |
...snip the yarn and pull it all the way through and out (48 and 49)...

It's a bit messy (50)! You need to weave in those ends...
 |
| (50) |
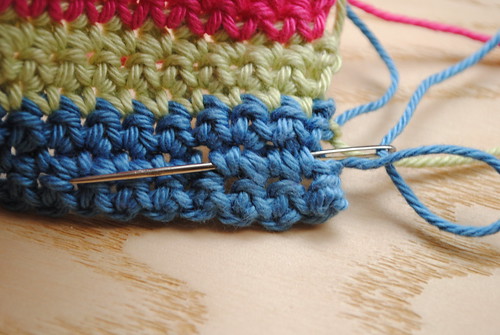
...weave the tail ends into the corresponding colour using a yarn needle (51)...
 |
| (51) |
Snip the tail ends off (52)...
 |
| (52) |
Yeah! You did it! A little colourful rectangle of crochet!
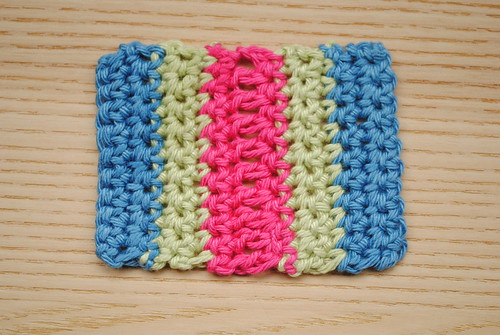
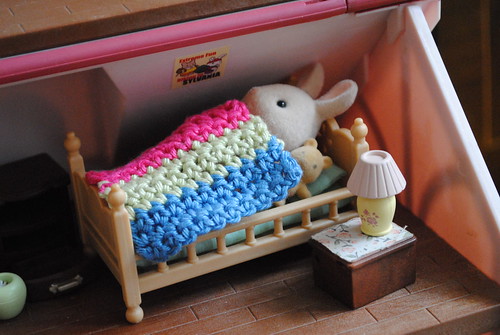
You could always now just sit and admire your handiwork and marvel at your own cleverness...or you could find a good use for it. Mine has been stolen for a family of rabbits :)
I hope this little tutorial helps you on your way to starting crochet - you won't regret it! If I have made any glaring errors, or if you have any questions, please do get in touch via email or comments.
Ali
xx
Ali
xx
Nicely explained, Ali. I like the ladders and bricks illustration. Remind your students never to be afraid of ripping out--it maybe frustrating, but it's how you learn. The more you do it, the more you understand the structure of the stitches and will find the making gets easier and easier!
ReplyDeleteI came the day before, shame as I would have said HI! I had a great time there. How did your teaching go and did you buy any lovely crafty bits?
ReplyDeleteHow did it go? A bit too far for me, but it would have been great! Hope it went well and that you enjoyed it.
ReplyDeleteThank you everyone! It went really well, great fun and I think I managed to convert a few people to the Crochet Side! :)
ReplyDeleteSpent a little too much on scrumptious new yarn though...of course!
Awww! This is gorgeous - I see why it got stolen ;) Many thanks for pinning our Rapunzels Retreat red and white bird bookends. Also, as a thanks for pinning our pic there's a £3 off voucher for any order over £15 with the code VALENTINE for you and your readers until the end of Feb. Many thanks for sharing! I love Pinterest. It's a great way to find new blogs. Your little one's leg warmers are adorable!
ReplyDelete